Jul 30, 2007

pay it forward giveaway

Still crankin' out those patterns! (Excuse me as I wipe the sweat from my brow ... phew!) In the meantime, sign up for my new mailing list in the side bar to get notified when the patterns go on sale. Isn't that chipmunk a dapper little guy?

Here's some fun news - it's my turn to pay it forward! A few days ago, I was notified by kwoozy that I had been picked in her pay it forward drawing. Here are the details if you care to play along:

"I will send a handmade gift to a random person who leaves a comment on my blog requesting to join this Pay It Forward exchange.

I don’t know what that gift will be yet and you may not receive it tomorrow or next week, but you will receive it within 365 days, that is my promise!

The only thing you haveif you like to do in return is pay it forward by making the same promise on your blog."
Are you in? I'm stoked about sending a special something to the lucky reader! Comment fingers ready? 3,2,1 ... Go! Comments will close the next time I post.

xo,
Meg


Jul 29, 2007

reading pillow pattern


Reading Pillow 2

Who wouldn't want to curl up with one of these and get lost in a book!? This has to be my favorite pattern. It was a hair-puller to conceptualize and put onto paper, but I'm ecstatic about the results! I only wish I had it finished when I was reading that heavy, heavy Harry Potter. Alas. From now on, I will be reading in absolute comfort, and you will too, once you have one of these on your lap!

Inspired by my grandma's well-loved reading pillow, this pattern adds some funky and useful twists, such as handmade piping, a built-in book mark, page holders, and pockets for your reading glasses and pencils.

As a teacher, I think these pillows have awesome potential for encouraging reading. I imagine that a collection for the elementary classroom would do wonders. A reading pillow would come in handy for anyone of reading age. Think of the possibilities - homeschooling, family reading time, college students, and grandparents. The days of reading = upper body workout need not continue!!

Today I'm making pumpkin pie. When I was back in California I grabbed an organic mix from my mom's pantry and dropped it in my luggage. I just can't wait for October. I see the can every time I walk into my kitchen. It has seduced me. Yum.

I hope you've been having a wonderful weekend!

xo,
Meg

Jul 28, 2007

my ... what a hairy baby you have, my dear

First off, thanks for all of your notes and comments following yesterday's little introduction. I can't wait to get to know all of you a little better! Also, thanks for your encouragement and enthusiasm regarding my new pattern collection. It's hard putting yourself out there, not knowing what kind of response one will receive.

Here's a sneak peek of one of the three patterns I will be starting to sell within the next month. I'm so happy with how it turned out, and I hope you mamas out there will love it! It's an Asian baby carrier, also known as a Mei Tai. But first things first, I really need to give a shout out to my cat, Timoun, who's a snuggly type and doesn't mind being carried around baby-style. FYI, he's about the size of a six-month-old infant. With a smaller head, of course ... and a hairy body.

Mei Tai Timoun side1

Mei Tai Timoun front view

Timoun me mei tai

Mei Tai back view cat foot 1

This is a really comfortable carrier. The shoulder straps are wide, and the weight is distributed comfortably across your back. There's no hardware or uncomfortable metal rings that pinch. Just pure, almost seamless, flannel-lined cotton. Yum. Also, the flip-up head support doubles as a nursing shield.

My pattern includes an internal x harness for safety and comfort. Most mei tais have straps that attach only to the edges of the main panel, which makes me a little nervous - this pattern is unique in its super safe construction. Here's a photo sketch (made at www.dumpr.net) of the x harness before sewing and inserting.

Mei Tai baby carrier photo sketch

For more photos of mei tai's, see the following links. I've also included a link on "how to wear a mei tai." It can be worn in the front, side, or back. But Timoun's not that complacent!

How to wear
Baby Hawk
Yummy Mummy

Check back tomorrow for a sneak peek at the second pattern, which is a design that the entire family will love. Here's a hint - it promotes literacy. Any guesses?

xo,
Meg

Jul 27, 2007

the puppeteer speaks

Meg's name badge

I think it's about time to properly introduce myself. When I first started this blog back in January, it was intended to be a resource for Montessori teachers like myself. I had envisioned creating a space to share ideas and techniques for making didactic material - in other words, a resource bank devoid of a personal story. I was simply to act as a puppeteer behind stage.

Um, hello there. I'm the puppeteer. And I'm ready to peek my head from behind the curtain and give a timid wave. You see, this blog has grown into much more than a collection of resources. This is thanks to you, my wonderful readers. You are not only Montessori teachers, but mothers, homeschooling families and craft enthusiasts as well. You might not be Montessorians by education or training, yet we share much in common. We are passionate about the handmade. We are champions of childhood. And so I extend to all of my readers a warm embrace of friendship. I'll be putting more of myself into the blog from now on. No more puppeteering. Just lil' ol' me, communicating my ideas, creations, thoughts, dreams, and hopes to my readers ... my friends.

Here are six random facts to help you get to know me better:

1.) I was a Montessori child. I attended a Montessori preschool and kindergarten. My teacher, Mary Jane, became my my friend and yoga teacher in my late teens. We remain in contact and I hold her in high esteem. She is one of the reasons why I decided to pursue Masters degree in Montessori education. I guess I've come full circle.

2.) I am an INFJ on the Myers-Briggs personality indicator test. Apparently, it's the most rare of the personality types. It does describe me pretty well. However, I am not a psychic, and I don't purport that I bear any resemblance to other supposed INFJs, such as Mother Theresa and Martin Luther King, Jr. Ha. Double ha.

3.) Music is another of my passions. Vocal music, to specify. My mom says that as soon as I could talk, I was singing. I was so fortunate to grow up in a community that supported the arts - my high school had (and still has) and incredible Chamber Choir. Check out this link to listen. We sang some really fun and challenging pieces. My senior year we toured Europe. I don't know if there's anything more otherworldly beautiful than sixteen gawky teenagers creating such complex, emotional melodies.

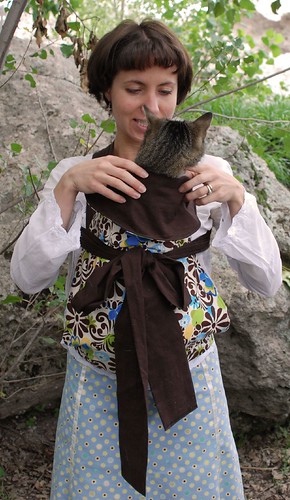
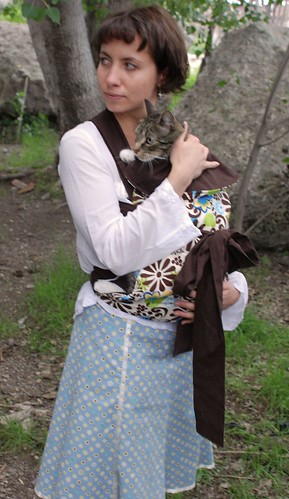
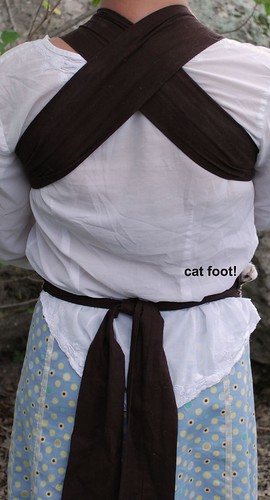
4.) I love animals. I'm not just "a crazy cat lady." If my family would let me, I would take in any animal - dog, cat, rabbit, horse, iguana - and give it a happy home. My two cats are, predictably, very spoiled.

5.) I live in rural Mexico. Why? Many of you have asked. My grandfather is Mexican, and I was curious to find out more about my heritage. My husband, Patrick, has a passion for history, and especially Latin American history. In fact, he's planning to get his PhD in the subject when we return to the US. We thought, "Why not spend several years in a Latin American country to learn the language and have a few adventures before having children?" It worked out great. I found this job at a one-room Montessori school, and Patrick continues to work for the DC-based organization, Just Foreign Policy, from the comfort of our home. We've both learned so much from the Mexican people, and my students have taught me more than any Masters degree ever could have. Our time here is running short, however. Patrick is already applying to graduate school, and as soon as this next school year is over, we will be heading back to the US.

6.) We don't have children yet, but we are looking forward to it! We're beginning to lay a foundation for a family. I'm looking to attend the 
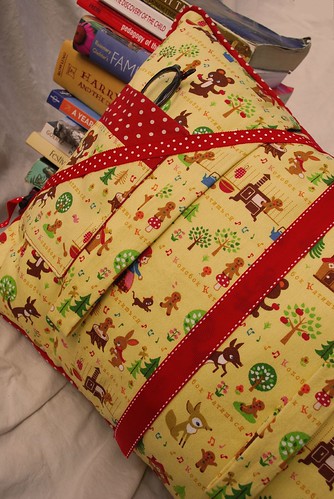
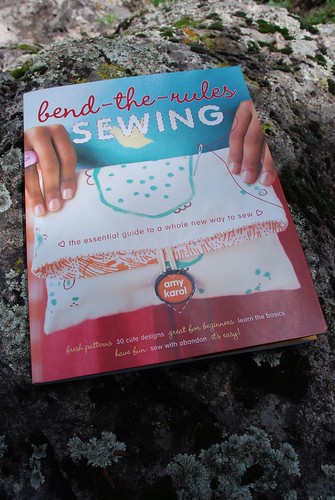
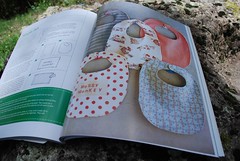
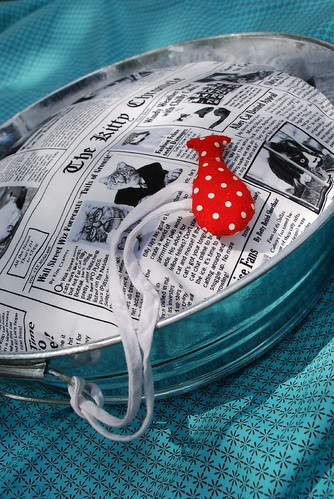
Montessori Assistants to Infancy course in 2009. Another key element is figuring out how to be able to stay at home with our children while my husband is racking in the big bucks as a grad student with a measly stipend. Here's my plan, and you folks will play an important role in its success - I'm going to create a collection of sewing patterns for sale! Also, in answer to many of your queries, I will be selling some of my original creations once we move back to the states. It just can't be done while living here - we have zero confidence in the postal service.

That's it for me, now it's your turn! I would love to know who you are, so leave a comment or shoot me an email at montessorirevolution@gmail.com. And thank you for being such a warm, supportive, and motivating community. Really, you are wonderful.

xo,
Meg


Jul 26, 2007

the best beginning sewing book. ever.

I know that a good chunk of my readers are not craft-aholics like myself who, if given the chance, will spend hours and hours in joyful harmony with their sewing machine. Many of you are homeschooling parents and Montessori teachers whose passion is children and teaching. And, while some of you probably have no desire to become one with a sewing machine, I know that MANY of you would love to be able sew, to be able to provide your children with handmade didactic materials and other items made from the heart. I've gotten countless emails from people saying "If only I could sew... ."

20070726 031

Here's the solution. Pick up a copy of Bend the Rules Sewing by fellow blogger Amy Karol. Never sewn a seam before? Don't own a machine? No worries. Amy will walk complete beginners through the initial steps of your sewing journey.

20070726 036
20070726 035

Before you know it, you will be able to sew in zippers, make bags, whip up a puppet theater, and pop out a few bibs. You will have all the necessary tools in your stash to tackle all the tutorials offered here at Montessori By Hand!

Here are a few items that I made from the book.

Cat Tuffet 2

I'm loving this cat tuffet, and so is my Amelie. My other "big-boned" (a.k.a. fat) cat, Timoun, might not fit. We'll see if I can find another galvanized metal tub in the next size up. And don't you dig this cat fabric? Found it at Ben Franklin's in California.

Placemat and napkin set

Napkin set

This placemat and napkin set was just the thing I needed to liven up my kitchen. I'm in the middle of a homemade kitchen makeover. Next on the list - a set of embellished tea towels and another cute apron. I found the set of Russian nesting doll melamine plates at Loft Party.

Check out the Bend the Rules Sewing Flickr group for more pics and inspiration.


Jul 25, 2007

corduroy embroidered pillow

corduroy embroidered pillow
Before leaving on our trip, I threw together some scrap fabric and embroidery floss for an easy traveling project.
corduroy embroidered pillow 2
I cut out the shapes and adhered them to the corduroy with Steam-A-Seam sticky back fusible web, threw it in a bag with some rick-rack and thread, and then embroidered with leisure during my outbound journey. The return journey was dedicated to Harry Potter, of course. I finished yesterday! My lips are zipped.

Also, shimmy on over to my new Flickr photos. A big thanks to Reese and Wendy for giving me some invaluable tips. I am now able to download with ease. The only bummer is that the medium size on Flickr doesn't fit in my template. I tried shrinking it proportionally to the necessary dimensions in the HTML code, but it ended up really reducing the quality - I could see the pixels! So, I'll have to figure out a way to remove the border around the photo and just deal with the fact that part of the right side will be cut off. Oh well. You can always click on the photo and it will take you to the un-cut version in Flickr.
embroidery floss on moss

Jul 24, 2007

you're in for a treat!

Here we are, back in the boondocks! It's nice to be home ... hello, bountiful garden! Hello, funny cats! Hello, sewing machine! And, oh, man, you guys are still here? Roof leaks, sink leaks, kitchen-without-a-dishwasher and scrubbing-board-where-there-should-be-a-washing-machine? I guess you all come as part of the "It's so charming to live in rural Mexico" package? (Insert sarcastic smile here.)

We had a wonderful time this past week and a half with family and friends, and we had great fun documenting our vacation with our new camera. Here's a little photo journal to give you a taste of the loveliness you will be witnessing with more frequency in my blog posts!

Flowers in my parents' yard

My niece at the pool

Her friend the froggie
My grandfather
The precious cargo that is making my fingers itch with crafty anticipation
Whoopdee! A humongous pile of fabric and a fantastic camera ... how am I going to be able to do anything other than make things and blog about them?

Can I ask for your expertise? Do any of you use Flickr to upload your photos to your blogs? I have (supposedly) set up my flickr account to be able to download directly to Blogger, but it only allows me to upload one photo per post. Also, the photo comes out somehow chopped - it seems to cut off one of the gray borders (see the previous post.) Any Flickr tips? Do I need to upgrade to a pro account to be able to do what I want to do?

It's nice to be back to the blogging world! I've missed you all!

:) Meg

Jul 10, 2007

ta ta for now, and an art project to keep you busy...

while I'm on vacation! I will be taking a bit of a bloggy break while my husband and I are jet setting around North America. First stop, Kentucky for a friend's wedding. Second stop, Nevada City, California for a visit with my parents, grandparents, brothers, and nieces. Plus, I'll be packing very light, leaving plenty of room for the new fabric stash I will be bringing back with me!


In the meantime, try this psychedelic art project. You'll have as much fun as the kids!

Materials:

* white poster board
* a stash of large crayons
* black liquid shoe polish
* black washable tempera paint
* larger paint brush
* newspaper
* toothpicks

*I used a small square of poster board for this photo shoot, but I suggest you color an entire sheet.

1.) Using so much force that you work up a sweat, color the poster board using the crayons. You need to push HARD. The more colors you use and the more often you change color, the better. The point here is not to make a design. It's simply to get plenty of different colors.

2.) Coat the entire sheet with liquid shoe polish. Wait for it to dry.

3.) Using your paint brush, add a coat of black paint. Allow to dry completely.

4.) Cut the poster board into smaller squares.

5.) Go at it with a toothpick! The black layer will easily scratch away, revealing the smörgåsbord of color beneath!

See you in ten days!

Meg

Jul 9, 2007

rain stick - palo de lluvia

Look at what I found in the corner of a little store out here in the middle of nowhere!

Did you know we had a pink sky? My old, broken camera sure thinks so. Thank goodness we bought one of these which we will retrieve when we visit California next week!

Rain sticks, or palos de lluvia, are an invention of Chilean natives, who used them prior to the arrival of the Spaniards in order to summon the rains. Rain sticks can be made from cactus or bamboo, and consist of a hollowed out shoot into which the cactus spines or nails are embedded in a spiral pattern. Small pebbles and seeds are closed within the shoot, and tilting the rain stick causes the pebbles to shower past the nails, thereby producing the rain sound.

When I started teaching in Creel, a rain stick was already in use in the classroom as a preparatory exercise for the Silence Game. At the beginning of the year, I give Grace and Courtesy lessons on what to do when you hear the rain stick. (Model stopping all movement and closing the eyes.) Once all of the children have had the lesson, I can "play" the rain stick at any moment in the day, and all of the children stop what they are doing, close their eyes, and experience several moments of silence and peace. Once I notice that one or more children start fidgeting, I say quietly "You may open your eyes and return to your work."

They love it.

Here's a link that explains how to make your own rain stick.

:) Meg

Jul 8, 2007

fine art and food art

Gushing gratitude for my blogging friend, Jo, from Japan! Jo put together some art card PDF files and sent them off to me to share with y'all. I've uploaded them to Box.net for easy downloading. Just click on the blue "Box View My Files" button in the side bar. The files are located in the "Art Cards" folder.

Another fabulous resource for art appreciation is the Child-Size Masterpiece series, available here at Montessori Services. I also recommend this book that tells you how to use the series in the home or classroom.

While we're on the topic of art, let me throw in another artsy idea - bento boxes! This is creativity extended to food. Jo first turned me on to the possibilities of Bento for children. Here's one of her creations:
Bento boxes are common in Japanese cuisine. They first made their appearance during the mid-1500's, and were eaten during a hanami, or tea party. Their portability made them popular among travelers, and their use later extended to teachers and school children, who brought their bentos for along for lunch.

The potential of bento boxes for children seems astronomical - a delighful, fun presentation of fresh, healthy, unprocessed food! I imagine that it would also be a fun way for the adult and child to corroborate in meal preparation. Here are some links to other bento box resources:

Bento Corner
English blog on creating bentos, specifically for children
Bento In Japanese and English
Cooking Cute - A Bento Site Links to lots of resources, including bento making supplies
Vegan Lunch Box Bento book for vegetarians and vegans, geared toward children
Bento Boxes - Japanese Meals on the Go
e-obento Japanese language blog with great pics

Jul 6, 2007

summer totes

My summer break has officially begun! The first thing I did upon waking was to visualize and come up with a design for some sturdy, large, denim totes. One for me (big enough to fit the new Harry Potter book and several knitting projects while airport-hopping,) and the other is for my mom - an early birthday gift. She gets the pink-y of the two. Notice the dark, foreboding sky? I snapped these shots just in time! Speaking of weather, Mark Twain once said, "The coldest winter I ever spent was summer in San Francisco." Um, Mark, you obviously didn't spend any time in Creel, Mexico.

I love the tie closing (found the idea here) and the pleats. I guess I've been into pleats lately.

Also, for you parents, I wanted to pass on this summer activity resource that I stumbled upon earlier today at Wise Craft. It seems to be a long and valuable list.

Jul 3, 2007

painting with feet

I love presenting this material to my students. Here's what you'll need:


  • large, thick paper - butcher paper won't do, because it's too thin
  • waterproof mat, larger than your paper, to place on floor. Try buying a meter of that picnic table material.
  • plastic tray large enough to fit your foot in
  • piece of felt to cover bottom of foot tray, and duct tape to secure it down
  • pitcher for transporting water
  • basin for washing feet when you're done
  • small bucket for transporting used water to drain
  • a chair
  • washable paint available on the shelf
  • towels for drying feet
  1. Place waterproof mat on floor. Bring the chair, basin, bucket, and clean towel to the work area. Place the basin just to the right of the chair, and drape the towel over the back of the chair. The bucket can be placed to the right of the basin. Fill pitcher with water and empty into the basin. Retrieve a piece of paper and place it in the middle of the waterproof mat.
  2. At the shelf, squirt a generous amount of paint onto the felt-bottomed foot tray. Bring tray over to work area, placing it on the mat, to the left of the paper.
  3. Sit down in the chair and remove shoes and socks. Place shoes to the left of the chair.
  4. Stand up and place one foot at a time into the foot tray. Step onto the paper.
  5. Demonstrate different techniques - painting with the big toes, tip-toes, whole foot, dragging the foot, etc.
  6. When you are finished, sit down in the chair and place painty feet in the basin. Rinse, using your hands, then use towel to dry off each foot individually. Put shoes on.
  7. Dump dirty water into the bucket, and transport it to a drain inside, or a thirsty plant outside.
  8. Place painting in a secure place to dry.
  9. Place the dirty towel with the laundry, and replace with a clean towel.
  10. Invite the child.
A neat variation for this is to use black paper and white paint. Also, mixing paint colors in the foot tray is nifty.

Happy foot painting,
Meg

birding, boxes, and beeswax

I'm loving this vocabulary card pouch set that I whipped up to go with my Audubon Field Guide bird cards. These field guides are available for mammals, reptiles, amphibians, insects, butterflies, and marine mammals.
Buy two (used) sets of the field guide, then cut them all up. Make copies of the informational section on each animal, then paste all the photos to card stock, pasting the copy of the information on the back of the picture only card. Here's what they should look like when the set is complete:
Ahem. My apologies to those who read this post before it was complete. My cat just published the post while I was away from the computer. Thank you, cat. Always so helpful.

I wanted to direct you to my blogging friend Leah, whose blog, HomeWork, has some great offerings. Please go and check out her tutorials - she has young children, and many of the projects are child/family friendly. Here are just a few, photos courtesy of Leah.

How to make beeswax candles

Also, check out Mod Podge masterpieces, here and here!

Until next time, unless the cat decides to publish again.

Meg

Jul 1, 2007

Sunday Song - Una Gatita


Here's a Meg original for y'all. I'd like to thank my two cats, Amelie (la gatita) and Timoun (el gatote) for all of their inspiration, which comes in the form of mischievous attacks on my crafting material. To listen to the audio file click on the song title in the side bar.

Una gatita, una gatita
jugando con estambre
Una gatita, una gatita
No! No! No!

Un gatote, un gatote
jugando con estambre
Un gatote, un gatote,
No! No! No!

Translation:
A little cat, a little cat
playing with yarn
A little cat, a little cat
No! No! No!

A big cat, a big cat
playing with yarn,
A big cat, a big cat,
No! No! No!

I told a little story before I sang this song the first time. I was peacefully knitting my sweater when all of a sudden, a little cat jumped up on the chair, grabbed the ball of yarn, and started running away with it. I ran after her, reclaimed by yarn, and returned to knit. Then came the big cat .... you get the picture.

Hope you like it!

xo,
Meg